TERMS AND CONDITIONS
These Terms and Conditions (these “Terms”), together with the attached or accompanying quote page (the “Quote,” collectively, this “Agreement”), exclusively govern the sale by Healthcare Markets, Inc., a Delaware corporation doing business as “Powered by MRP” (“MRP”), and the purchase and use by the buyer set forth on the Quote (“Buyer”), of the equipment (the“Equipment”) and/or services (the “Services”).
1. EQUIPMENT AVAILABILITY. Equipment offered for sale by MRP is subject to availability. MRP shall not be liable to Buyer in case of stock outage or unavailability of the Equipment. MRP reserves the right to change the equipment offered for sale at any time and without notice to Buyer. Availability of equipment may be determined when an order is placed, and, if unavailable, MRP will inform Buyer of such unavailability, offer other available equipment as substitution or cancel the order. Such cancelled order will be refunded by MRP to Buyer, except for an order for a Special Order Product, which cannot be cancelled once the order is placed.
2. PRICES. Written price quotations on the Quote shall last for ten (10) days from the date issued and then automatically expire, and quoted prices do not include taxes, freight, handling, duty, insurance or other similar charges, which Buyer must pay unless waived in writing by MRP or a valid tax exemption certificate is provided to MRP. Notwithstanding the foregoing, all published prices may be changed by MRP at any time without notice to Buyer.
3. TERMS OF PAYMENT. Unless otherwise agreed to on the Quote or in writing by MRP, prepayment in full is required, by bank transfer, cash, credit card or certified check, and where partial pre-payment is permitted, such payment shall be nonrefundable with the balance due net thirty (30) days from the date of invoice. MRP reserves the right to modify or revoke any credit previously extended. Past due balances shall be subject to a service charge of one and one-half percent (1.5%) per month, not to exceed the maximum amount permitted by applicable law. Buyer agrees to pay all fees, charges or other sums payable hereunder, including collection fees incurred, with no right of set-off or reduction of any nature unless approved in writing by an MRP corporate officer (an “MRP Officer”). Buyer hereby grants, and MRP reserves, a purchase money security interest in the Equipment purchased, and in any proceeds thereof, to secure Buyer’s payment obligations hereunder. Buyer shall cooperate fully with MRP to execute such documents and accomplish such filings and/or recordings as MRP may deem necessary for the protection of its interests in the Equipment furnished to Buyer, and in the event Buyer does not aid within a reasonable time after MRP asks Buyer to do so, Buyer hereby authorizes and appoints MRP as Buyer’s attorney-in-fact to execute, deliver and file at any time, any financing statement and/or take any other action permitted by applicable law to perfect, enforce, continue and amend MRP’s security interest in any jurisdiction deemed appropriate by MRP. Buyer agrees that upon nonpayment of any charges due to MRP, MRP may cancel or delay delivery of the Equipment and/or suspend any applicable service coverage, which may resume only when MRP receives payment in full, and the warranty period will continue to run during such time of nonpayment although warranty service will not be available.
4. SHIPMENT AND DELIVERY. Delivery dates are estimated, and partial deliveries are allowed. MRP shall not be liable for or in respect of any loss or damage arising from any delay in filling any order, failure to deliver or delay in delivery. No delay in the shipment or delivery of any Equipment relieves Buyer of its obligations under this Agreement, including, without limitation, accepting delivery of any remaining installment(s) of the Equipment, if applicable. Buyer must pay for, and hold MRP harmless from, all shipping, delivery, and insurance expenses unless otherwise agreed in writing by an MRP Officer or otherwise indicated on the Quote. MRP will not assume any liability if MRP selects the shipping methods nor will any carrier be deemed to be MRP’s agent. “Time is of the essence” terms will not apply to orders accepted by MRP. Title and risk of loss of the Equipment shall pass to Buyer, and delivery shall be deemed completed, when the Equipment is delivered to Buyer’s address. Should loss or damage in transit occur, Buyer’s payment obligations will not be affected. Buyer is liable for all costs for MRP’s holding or storing of the Equipment if delivery is delayed by Buyer or at Buyer’s request. If delivery is delayed over thirty (30) days, MRP may, at its option and upon notice to Buyer, cancel that and all future deliveries without further liability or obligation of any kind.
5. FORCE MAJEURE. MRP shall not be responsible for delays or failure to render or service any Equipment and/or perform any Service due to any cause beyond MRP’s control, including, but not limited to: (a) acts of God; (b) flood, fire, earthquake, epidemic, pandemic or explosion; (c) war, invasion, hostilities (whether war is declared or not), terrorist threats or act, riot or other civil unrest; (d) government order, law or actions; (e) embargoes or blockades in effect on or after the date of this Agreement; (f) national or regional emergency; (g) strikes, labor stoppages or slowdowns or other industrial disturbances; and (h) telecommunication breakdowns, power outages or shortages, lack of warehouse or storage space, inadequate transportation services or inability or delay in obtaining supplies of adequate or suitable material (each, a “Force Majeure Event”). Any delivery date may be extended, at MRP’s sole discretion, to the extent of any delay resulting from any Force Majeure Event.
6. ACCEPTANCE; INSPECTION. Except for Special Order Products, Buyer shall inspect all Equipment upon delivery and within forty-eight (48) hours of delivery to Buyer shall give written notice to MRP of any error or claim that any Equipment does not conform to the terms of this Agreement; any claims not made within such period shall be deemed waived and released, with the Equipment being accepted by Buyer. Except as provided under this Section 6 and Section 7 hereof, all sales of Equipment to Buyer are made on a one-way basis, and Buyer has no right to return Equipment purchased under this Agreement to MRP. Subject to the warranty set forth in Section 8(c)(iv), Services are deemed to be accepted by Buyer upon completion of their performance by MRP.
7. CANCELLATION CHARGES AND RETURNED EQUIPMENT POLICY. Returns and cancellations are not permitted without written approval by an MRP Officer, which shall be made in such MRP Officer’s sole discretion. If approved, MRP will issue a return merchandise authorization number, which Buyer must include in the returned packaging, and Buyer must pay MRP either a (a) twenty percent (20%) restocking charge on the purchase price of the item if Buyer’s written request for return or cancellation is received by MRP’s headquarters after MRP’s original shipment of the Equipment or (b) a ten percent (10%) cancellation damages charge if Buyer’s request was received before said shipment. The foregoing charges are agreed upon, not as a penalty, but because of the difficulty of computing actual damages, and until the applicable charge is paid and the Equipment has been received back by MRP in new condition, no refund will be given. This document or copies hereof may be filed with the appropriate authorities as a financing statement to pursue such charges. In no case will shipping and freight costs be refunded. Removed, replaced or substituted equipment and parts (collectively, “Returned Equipment”) shall become MRP’s property, with title and ownership transferring to MRP upon the earlier of its return or replacement, with MRP owing no other obligations on the Returned Equipment. Buyer hereby agrees to indemnify, defend and hold harmless MRP Indemnitees from any claims, costs, losses, attorneys’ fees and expenses related to any third-party attempts to claim ownership of the Returned Equipment or dispute any trade-in, removal, substitution or replacement, and the remaining provisions shall continue in full force and effect.
8. MRP’S WARRANTIES, IF ANY.
(a) Equipment Sold “As Is.” UNLESS OTHERWISE STATED ON THE QUOTE OR IN A WRITING SIGNED BY AN MRP OFFICER, BUYER AGREES THAT THE EQUIPMENT SOLD IN THIS AGREEMENT IS BEING SOLD ON AN “AS IS,” “AS AVAILABLE” BASIS, SUBJECT TO SECTIONS 8(c) AND 9, AND HAVE NO WARRANTIES OR REPRESENTATIONS OF ANY KIND, WHETHER IMPLIED OR ARISING BY LAW, STATUTE OR OTHERWISE, INCLUDING, WITHOUT LIMITATION, ANY WARRANTIES OF MERCHANTABILITY, FITNESS FOR A PARTICULAR PURPOSE OR USE, NON-INFRINGEMENT, WORKMANLIKE MANNER, QUALITY, ACCURACY, TITLE, AND/OR IMPLIED FROM A COURSE OF DEALING OR PERFORMANCE USAGE IN TRADE.
(b) Special Order Product. If this Agreement includes the sale of a product that MRP does not currently have or typically keep in stock, in MRP’s sole determination, but is acquired from a third party specifically for Buyer (a “Special Order Product”), then Buyer agrees that (i) Buyer, at its sole discretion, has made the selection of such Special Order Product, (ii) such Special Order Product is being acquired by MRP solely at the request of Buyer, (iii) no representation, warranty or guarantee has been made by MRP with respect to such Special Order Product, (iv) the obligation of Buyer to pay MRP for the Special Order Product is absolute and unconditional, and (v) Buyer waives and releases MRP from all claims, damages and losses arising out of such Special Order Product. Special Order Products carry no right to inspection before or after delivery, and MRP is not responsible for examining or evaluating such Special Order Products. MRP makes no warranty about Special Order Products and offerings of the third party (including description of the Special Order Product). MRP does not assume any responsibility or liability for the actions, product and content of all these and any other third parties. If there are any problems with any Special Order Product, Buyer must contact the manufacturer of such Special Order Product for assistance.
(c) Limited Warranties, If Any.
(i) If the Quote expressly states that the Equipment has a warranty for a certain time (a “Warranty Period”), then MRP warrants that the Equipment shall be in good working order under normal use for the Warranty Period, which Warranty Period shall commence from the date of delivery to Buyer (the “Delivery Date”), unless otherwise approved by an MRP Officer in writing, except for the following: (A) New (not used or pre-owned) Equipment that is to be serviced by MRP: if the Quote is silent, warranted to be in good working order under normal use for one hundred eighty (180) days from the Delivery Date; (B) Used Equipment sold refurbished by MRP: if the Quote is silent, warranted to be in good working order under normal use for thirty (30) days from the Delivery Date; (C) Consumable/disposable Equipment: if the Quote is silent, warranted to have been shipped from MRP in functional condition, and no additional warranty shall apply; no service shall be provided either. These items should be inspected for obvious damage, subject to Section 6 and 8(e), and MRP’s obligation under this warranty and this Section 8(c)(i)(C) is limited to replacement of the Equipment; and (D) New (not used or pre-owned) Equipment that is to be serviced by the manufacturer: if the Quote is silent, MRP makes no warranty for any such Equipment. Buyer’s sole warranty for any such Equipment, if any, shall be the original manufacturer’s warranty, which MRP agrees to pass on to Buyer, as applicable. (ii) For the limited warranties of Section 8(c)(i), including exceptions (A) and (B), but not (C) or this (D), Buyer is entitled to telephone, e-mail and video technical assistance and, subject to Sections 8(d) and 8(e), repair or replacement of such Equipment, in MRP’s sole discretion, should the Equipment become inoperative through normal use during the Warranty Period. Loaner equipment is not provided, but if so arranged by MRP, Buyer shall pay MRP the cash list price of any unreturned loaner equipment provided by MRP within seven (7) days of a written demand from MRP. (iii) Repair or replacement under any limited warranty of Equipment may be with parts or products that are new, used or refurbished, carrying the same limited warranty for the remaining term of the original item. Repairs or replacements shall not interrupt, extend or prolong the term of the warranty. (iv) For Services purchased under this Agreement, MRP warrants that the Services shall be performed using competent personnel in a professional manner in accordance with generally recognized industry standards for similar services. Subject to Sections 6 and 8(e) herein, if any Service was not performed in accordance with the aforementioned warranty, then MRP shall, in its sole discretion, either (A) repair or re-perform the applicable Service, or (B) credit or refund the price of such Service at the pro rata contract rate.
(d) Exclusions. MRP reserves the right, without liability, to void all warranties and remedies, including any obligation to service, repair, replace or otherwise remedy defects, errors or failures of the Equipment due to the occurrence of any of these events, and MRP shall be in no way responsible for: (i) handling, maintenance or use in a manner that is inconsistent with and/or contrary to the original manufacturer’s or MRP’s recommended procedures and/or instructions, including, without limitation, use of or with an unauthorized third-party good or part; (ii) any failure or damage resulting from negligence, alteration, modification or relocation of the Equipment by Buyer, its employees, agents or representatives; (iii) attempted or actual unauthorized dismantling, disassembling, service, repair, addition or change of the Equipment, including, without limitation, changing the serial number or shot count; (iv) abnormal wear and tear, including, without limitation, use under abnormal conditions (e.g., unclean, dusty, or exposure to extreme electromagnetic radiation, temperature or humidity); or (v) damage or failure of the Equipment due to a Force Majeure Event or a problem in the premises of the Equipment. In any of the above situations, or for any Equipment that has no warranty, MRP has sole discretion to service the Equipment, at Buyer’s expense, at MRP’s then-in-effect rates for service, labor, travel, shipping and materials.
(e) Notice and Inspection. The limited warranties contained in this Section 8 are made on condition that immediate written notice of any noncompliance with the Equipment’s and/or the Service’s warranty be given to MRP, and provided that MRP’s inspection reveals that Buyer’s claim is valid under the terms of such warranty.
9. DISCLAIMERS; NO OTHER WARRANTY. EXCEPT TO THE EXTENT AS PROVIDED IN SECTION 8(c)(i)(D), BUYER ACKNOWLEDGES THAT MRP IS NOT BOUND BY ANY WARRANTY THAT MAY BE SET FORTH IN A MANUFACTURER’S WRITTEN MATERIALS THAT WOULD HAVE APPLIED HAD BUYER PURCHASED THE EQUIPMENT DIRECTLY FROM THE MANUFACTURER IN ITS UNUSED STATE. BUYER ACKNOWLEDGES THAT BUYER HAS NOT RELIED UPON ANY WARRANTY OTHER THAN AS SET FORTH IN THIS AGREEMENT. IN ADDITION, BUYER ALSO HEREBY ACKNOWLEDGES AND AGREES THAT ANY ORAL OR WRITTEN STATEMENTS CONCERNING USE AND REGULATION OF MEDICAL DEVICES SOLD BY MRP ARE AND SHALL BE CONSTRUED AS FOR INFORMATIONAL PURPOSES ONLY AND WITHOUT WARRANTY OR ASSURANCE BY MRP AS TO THEIR ACCURACY OR VALIDITY. MRP ALSO HEREBY DISCLAIMS ANY AND ALL WARRANTIES REGARDING OTHER MEDICAL CARE OR HELP, INCLUDING THE SELECTION OF AESTHETIC AND MEDICAL PROCEDURES AND PRODUCTS FOR, OR CARE OF, PATIENTS. THE LIMITED WARRANTIES OF THIS AGREEMENT, IF APPLICABLE TO ANY EQUIPMENT OR SERVICE FURNISHED UNDER THIS AGREEMENT, CONSTITUTE THE ONLY WARRANTIES MADE WITH RESPECT TO THE EQUIPMENT AND/OR SERVICE AND ANY DEFECT, DEFICIENCY OR NONCONFORMITY. TO THE EXTENT PERMITTED BY LAW, SUCH WARRANTY IS IN LIEU OF ALL OTHER WARRANTIES, EXPRESS OR IMPLIED BY LAW, COURSE OF DEALING, COURSE OF PERFORMANCE, USAGE OF TRADE OR OTHERWISE, INCLUDING, BUT NOT LIMITED TO, ANY EXPRESS OR IMPLIED WARRANTY OF MERCHANTABILITY, TITLE, NONINFRINGEMENT OR FITNESS FOR A PARTICULAR PURPOSE.
10. LIMITATION OF LIABILITY. NOTWITHSTANDING ANYTHING TO THE CONTRARY IN THIS AGREEMENT, UNDER NO CIRCUMSTANCES SHALL MRP BE LIABLE FOR ANY INDIRECT, PUNITIVE, INCIDENTAL, CONSEQUENTIAL, EXEMPLARY OR SPECIAL DAMAGES, ARISING FROM, RELATED TO OR CAUSED, DIRECTLY OR INDIRECTLY, WHETHER FORESEEABLE OR NOT, BY THE EQUIPMENT AND/OR THE SERVICES, THE USE OR INABILITY TO USE THE EQUIPMENT, THE RESULTS GENERATED FROM THE EQUIPMENT AND/OR THE SERVICES, THIS AGREEMENT, ANY OTHER ACT OR OMISSION OF MRP, OR BASED UPON ANY OTHER LEGAL THEORY. IN NO EVENT SHALL MRP BE LIABLE FOR ANY LOSSES OF REVENUE, USE, BUSINESS OPPORTUNITY, PROFIT, SAVINGS OR ANY OTHER DAMAGES DUE TO ANY CAUSE WHATSOEVER, EVEN IF MRP OR ITS AGENTS HAS BEEN ADVISED OF THE POSSIBILITY THEREOF. THE FOREGOING IS A SEPARATE, ESSENTIAL TERM OF THIS AGREEMENT, AND SHALL BE EFFECTIVE UPON THE FAILURE OF ANY REMEDY, EXCLUSIVE OR NOT. IN NO EVENT WILL MRP’S TOTAL LIABILITY UNDER THIS AGREEMENT EXCEED THE PURCHASE PRICE ACTUALLY PAID TO MRP BY BUYER FOR THE EQUIPMENT AND/OR THE SERVICES GIVING RISE TO THE CLAIM FOR WHICH DAMAGES ARE BEING SOUGHT. NO SUIT OR ACTION MAY BE BROUGHT BY BUYER, ITS SHAREHOLDERS, DIRECTORS, MANAGERS, EMPLOYEES OR AGENTS FOR ANY BREACH OF THIS AGREEMENT MORE THAN ONE (1) YEAR AFTER THE ACCRUAL OF SUCH CAUSE OF ACTION. IT IS AGREED THAT MRP’S LIABILITY IS SO LIMITED. WITHOUT LIMITING THE GENERALITY OF THE FOREGOING, BUYER ASSUMES ALL RISK AND LIABILITY FOR THE RESULTS OBTAINED BY THE USE OF ANY EQUIPMENT IN THE PRACTICE OF ANY PROCESS, WHETHER IN TERMS OF OPERATING COSTS, GENERAL EFFECTIVENESS, SUCCESS OR FAILURE, AND REGARDLESS OF ANY ORAL OR WRITTEN STATEMENTS MADE BY MRP, BY WAY OF TECHNICAL ADVICE OR OTHERWISE, RELATED TO THE USE OF THE EQUIPMENT.
11. BUYER’S REPRESENTATIONS AND WARRANTIES. Buyer represents and warrants to MRP that: (a) Buyer is duly organized, validly existing, and in good standing in the jurisdiction of Buyer’s formation; (b) Buyer is duly qualified to do business and is in good standing in every jurisdiction in which such qualification is required; (c) Buyer has the full right, power, and authority to enter into this Agreement and to perform Buyer’s obligations under this Agreement; (d) the execution of this Agreement by the person whose signature is set forth at the end hereof has been duly authorized by all necessary corporate action of Buyer; (e) when executed and delivered by each of MRP and Buyer, this Agreement will constitute the legal, valid and binding obligation of Buyer, enforceable against Buyer in accordance with its terms; (f) Buyer is in compliance with all applicable laws relating to this Agreement, the Equipment and the operation of Buyer’s business; (g) Buyer is not insolvent and is paying all of its debts as they become due; and (h) all financial information that Buyer has provided to MRP is true and accurate and fairly represents Buyer’s financial condition.
12. PROPRIETARY RIGHTS.
(a) Ownership. No sale shall be construed as granting to Buyer any license or other right in, or to, any of MRP’s (i) patents; (ii) trademarks; (iii) internet domain names, whether or not trademarks, registered by any authorized private registrar or governmental authority, web addresses, web pages, websites and URLs; (iv) works of authorship, expressions, designs and design registrations, whether or not copyrightable, including copyrights and copyrightable works, software and firmware, technical data, data files, and databases and other specifications and documentation; (v) trade secrets; (vi) environmental or other testing applicable to the Equipment and/or the Services; and (vii) industrial and other intellectual property rights, and all rights, interests, and protections that are associated with, equivalent or similar to, or required for the exercise of, any of the foregoing, however arising, in each case whether registered or unregistered and including all registrations and applications for, and renewals or extensions of, such rights or forms of protection pursuant to the laws of any jurisdiction throughout in any part of the world (collectively, the “Intellectual Property Rights”).
(b) Prohibited Acts. Buyer shall not (i) take any action that might interfere with any of MRP’s rights in or to Intellectual Property Rights, including MRP’s ownership or exercise thereof; (ii) challenge any right, title, or interest of MRP in or to the Intellectual Property Rights; (iii) make any claim or take any action adverse to MRP’s ownership of the Intellectual Property Rights; (iv) register or apply for registrations, anywhere in the world, for MRP’s trademarks or any other trademark that is similar to MRP’s trademarks or that incorporates MRP’s trademarks in whole or in confusingly similar part; (v) use any mark, anywhere that is confusingly
similar to MRP’s trademarks in whole or in confusingly similar part; (vi) engage in any action that tends to disparage, dilute the value of or reflect negatively on the Equipment and/or the Services or any of MRP’s trademarks; (vii) misappropriate any of MRP’s trademarks for use as a domain name without prior written consent from MRP; or (viii) alter, obscure or remove any of MRP’s trademarks, or trademark or copyright notices or any other proprietary rights notices placed on the
Equipment, marketing materials or other materials that MRP may provide.
13. CONFIDENTIAL INFORMATION. Without the prior written consent of MRP,Buyer, directly or indirectly, shall not disclose (and will direct its directors, shareholders, employees and agents not to disclose) any Confidential Information. The term “Confidential Information” means any information of or relating to MRP or the Equipment and/or the Services not generally known to the public (other than as a result of disclosure in violation of this Agreement) in spoken, printed, electronic or any other form or medium, including, but not limited to, business processes, practices, methods, policies, plans, publications, documents, research, operations, services, strategies, techniques, agreements, contracts, transactions, potential transactions, know-how, trade secrets, databases, manuals, records, supplier information, financial information, accounting information, legal information, marketing information, pricing information, payroll information, personnel information, and supplier lists.
14. NON-SOLICITATION. Buyer agrees not to solicit or hire any personnel of MRP involved with the delivery of the Services during the provision of such Services and for twelve (12) months after the completion of such Services; provided, however, that Buyer may hire individuals employed by MRP who, without other solicitation, respond to advertisements or solicitations aimed at the general public.
15. EQUITABLE REMEDIES. Buyer acknowledges and agrees that (a) a breach or threatened breach by Buyer of any of its obligations under Sections 13 or 14 would give rise to irreparable harm to MRP for which monetary damages would not be an adequate remedy and (b) in the event of a breach or a threatened breach by Buyer of any such obligations, MRP shall, in addition to any and all other rights and remedies that may be available to MRP at law, at equity, or otherwise in respect of such breach, be entitled to equitable relief, including a temporary restraining order, an injunction, specific performance, and any other relief that may be available from a court of competent jurisdiction, without any requirement to post a bond or other security, and without any requirement to prove actual damages or that monetary damages will not afford an adequate remedy. Buyer agrees that Buyer will not oppose or otherwise challenge the appropriateness of equitable relief or the entry by a court of competent jurisdiction of an order granting equitable relief, in either case, consistent with the terms of this Section 15.
16. INDEMNIFICATION. Buyer agrees to indemnify, defend and hold harmless MRP and its directors, shareholders, employees and agents (collectively, “MRP Indemnitees”) against any liability, damage, loss or expense incurred by or imposed in connection with any claims, suits, actions, demands or judgments arising out of (a) any breach or non-fulfillment of any representation, warranty or covenant set forth in this Agreement by Buyer or its directors, managers, employees or agents (collectively, “Buyer’s Agents”); (b) any negligent act or omission or willful misconduct of Buyer or Buyer’s Agents in connection with this Agreement; (c) any bodily injury, death of any person or damage to real or tangible personal property caused by Buyer or Buyer’s Agents, including the use of unauthorized parts in or service of the Equipment; (d) any failure by Buyer or Buyer’s Agents to comply with any applicable laws; (e) any fraud or other intentional acts by Buyer or Buyer’s Agents; and (f) the use or operation of the Equipment, including, without limitation, any medical and/or surgical procedures performed by Buyer, and any of Buyer’s Agents, using the Equipment unless said damages are determined by a court of competence jurisdiction to be solely by the gross negligence of MRP or solely as result of a breach by MRP of the limited warranties contained herein.
17. DEFAULTS; REMEDIES. Notwithstanding anything herein to the contrary, should Buyer fail to pay for the order or any other amount, in whole or in part, when due or perform its other obligations under this Agreement or as otherwise mutually agreed in writing between Buyer and MRP (each, a “Default”), then MRP may take any and all actions available under law or equity to collect said amounts with a ten (10) day prior written notice, including, but not limited to, enforcing its security interest, accelerating the payment of and declaring immediately due and payable any unpaid balance of the order, referral to outside collection agencies and/or commencement of legal action. MRP’s rights shall be cumulative, and it shall not be required to have attempted to realize upon to the Equipment before taking any other collection actions. MRP may require that Buyer assemble and return any or all of the Equipment to MRP and, in the event Buyer fails to return such Equipment peaceably, enter upon the premises where such Equipment is located, with or without legal process, and repossess such Equipment. Upon a Default, Buyer agrees to pay upon MRP’s demand: (i) all costs and expenses incurred by MRP or its assignee in connection with the enforcement of any remedies, including all expenses incurred in connection with the return, sale, release or other disposition of the Equipment, including attorneys’ fees and other costs incurred by MRP or its assignee in enforcing or defending its rights and remedies under this Agreement and any other written agreement between Buyer and MRP.
18. COMPLIANCE WITH LAWS. Buyer shall (a) carry out the transactions contemplated by this sale and deal with the Equipment in conformity with all applicable laws, rules and regulations of all government authorities, including, without limitation, export laws, (b) obtain all permits and licenses required in connection with the purchase, shipment, installation or use of the Equipment, and (c) be solely responsible to fully understand and comply with laws, rules and regulations. Any information provided is as a convenience only.
19. FURTHER ASSURANCES. Upon MRP’s reasonable request, Buyer shall, at its sole cost and expense, execute and deliver all such further documents and instruments, and take all such further acts, necessary to give full effect to this Agreement.
20. ASSIGNMENT; SUCCESSORS AND ASSIGNS. Buyer cannot delegate any duties nor assign any rights or claims under this Agreement without MRP’s prior written consent, and any such attempt or assignment shall be void. In the event that Buyer finances its acquisition of any Equipment with a third party, Buyer may direct MRP to transfer title of such Equipment to such third-party financing company, with all remaining terms and conditions of this Agreement remaining in full force and effect. This Agreement is binding on and inures to the benefit of the parties to this Agreement and their respective permitted successors and permitted assigns.
21. NO THIRD-PARTY BENEFICIARIES. Subject to Section 16, this Agreement benefits solely the parties to this Agreement and their respective permitted successors and assigns, and nothing in this Agreement, express or implied, confers on any other person any legal or equitable right, benefit, or remedy of any nature whatsoever under or by reason of this Agreement.
22. GOVERNING LAW; VENUE. The application of the UN Convention on Contracts for the International Sale of Goods is expressly excluded. The parties agree that any and all claims, demands, disagreements, controversies or disputes arising out of or relating to this Agreement and any agreement or document delivered in connection herewith (collectively, “Claims”) shall be governed by and construed in accordance with the laws of the State of Utah and adjudicated exclusively in the state and federal courts located in or nearest to Summit County, Utah, which courts shall have the sole and exclusive jurisdiction and venue for adjudication of all Claims. The parties hereby agree upon, consent and stipulate to the jurisdiction and venue of the aforementioned courts for the adjudication of all Claims, to the exclusion of all other courts, forums and venues whatsoever.
23. NON-DISPARAGEMENT. Buyer shall not disparage MRP or MRP’s trademarks, websites, products or services, or display any such items in a derogatory or negative manner on any website or in any public forum or press release.
24. NOTICES. Any notice, demand, or communication required, permitted or desired to be given hereunder shall be deemed effectively given when personally delivered, when sent by electronic means, when received by overnight courier, or when mailed by prepaid, certified or registered mail, return receipt requested, addressed to the other party at its address set forth on the Quote or to such other address that the receiving party may designate from time to time in accordance with this Section 25.
25. PUBLIC ANNOUNCEMENTS. Unless otherwise stated herein, neither party shall issue a press release or otherwise advertise, make a public statement or disclose to any third-party information pertaining to the relationship arising under this Agreement, the existence or terms of this Agreement, the underlying transactions between MRP and Buyer or agent for Buyer or refer to the other party in relation to this Agreement without the other party’s prior written approval.
26. ENTIRE AGREEMENT; ADDITIONAL OR INCONSISTENT TERMS. Subject to Section 32, this Agreement constitutes the sole and entire agreement between the parties hereto relating to the subject matter hereof, and any unincorporated representation, affirmation of fact, course of prior dealings, promise or condition in connection therewith, or usage of the trade, shall not be binding on either party. Terms and conditions set forth which differ from, conflict with or are not included in this Agreement shall not be part of any agreement between MRP and Buyer unless both parties specifically accept such terms and conditions in writing.
27. WAIVER. No waiver under this Agreement is effective unless it is in writing and signed by the party waiving its right. Any waiver authorized on one occasion is effective only in that instance and only for the purpose stated and does not operate as a waiver on any future occasion. None of the following constitutes a waiver or estoppel of any right, remedy, power, privilege or condition arising from this Agreement: any failure or delay in exercising any right, remedy, power or privilege or in enforcing any condition under this Agreement; or any act, omission or course of dealing between the parties.
28. SURVIVAL. Subject to the limitations and other provisions of this Agreement, the representations and warranties of Buyer contained herein shall survive the expiration or earlier termination of this Agreement for a period of twelve (12) months after such expiration o termination and (b) this Section 29 and Sections 10, 12, 13, 14, 15, 16, 17, 21, 22, 23, 24, 26, and 32 of this Agreement, as well as any other provision that, in order to give proper effect to its intent, should survive such expiration or termination, shall survive the expiration or earlier termination of this Agreement. All other provisions of this Agreement shall not survive the expiration or earlier termination of this Agreement.
29. RELATIONSHIP OF PARTIES. Nothing in this Agreement creates any agency, joint venture, partnership or other form of joint enterprise, employment or fiduciary relationship between the parties. Neither party has any express or implied right or authority to assume or create any obligations on behalf of or in the name of the other party or to bind the other party to any contract, agreement or undertaking with any third party.
30. HEADINGS. The headings in this Agreement are for reference only and do not affect the interpretation of this Agreement.
31. ORDER OF PRECEDENCE. In the event of conflict between the Quote, a written agreement by MRP, and these Terms, the order of priority shall be: (1) the written
agreement by MRP, if only if executed by an MRP Officer, (2) the Quote and (3) these Terms, and only to the extent of the direct conflict. Notwithstanding the foregoing, MRP shall not be bound by, and specifically objects to, any terms, conditions or other provisions, both written and oral, which are different from, in addition to or inconsistent with the provisions of this Agreement which are set forth in any purchase order, receipt, acceptance, confirmation, correspondence or otherwise of, or by, Buyer. Fulfillment of Buyer’s order shall not constitute acceptance of any of Buyer’s terms and conditions and does not serve to modify or amend the terms and conditions contained herein.
32. SEVERABILITY. If any part of this Agreement is held to be void, illegal or unenforceable, then it shall be deemed to be severed from this Agreement and the remaining provisions shall continue in full force and effect; provided, however, that if any fundamental term or provision of this Agreement is held to be void, illegal or unenforceable, the remainder of this Agreement shall be unenforceable. Upon a determination that any term or provision is void, illegal or unenforceable, the parties shall negotiate in good faith to modify this Agreement to effect the original intent of the parties as closely as possible in order that the transactions contemplated hereby be consummated as originally contemplated to the greatest extent possible.

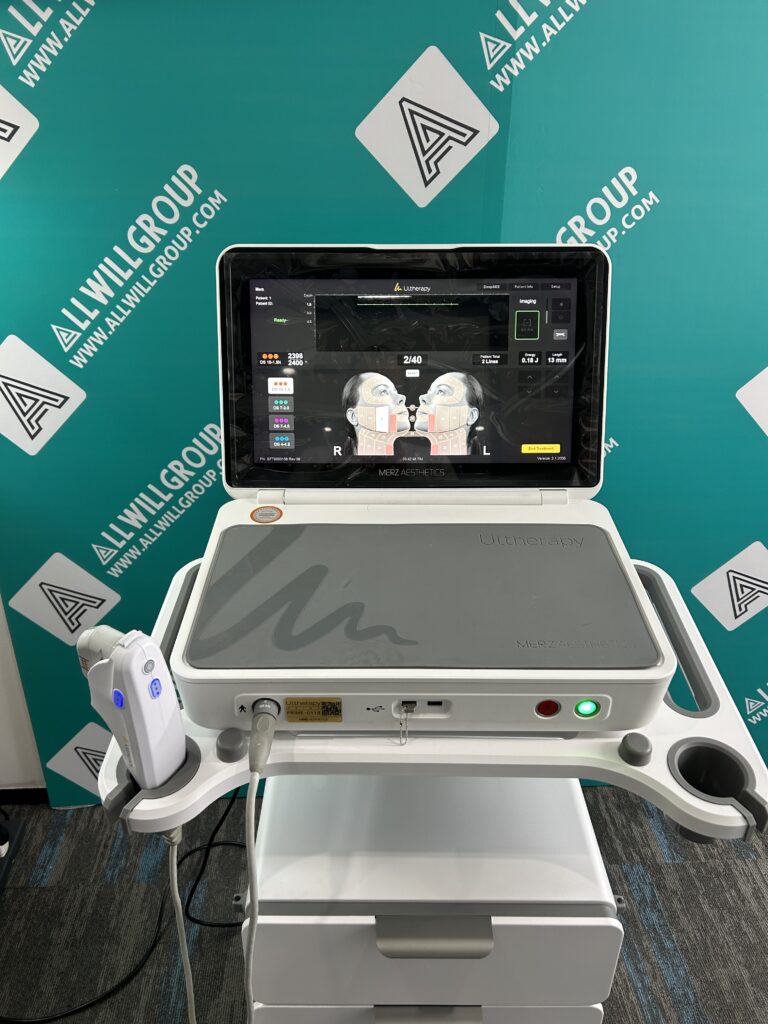
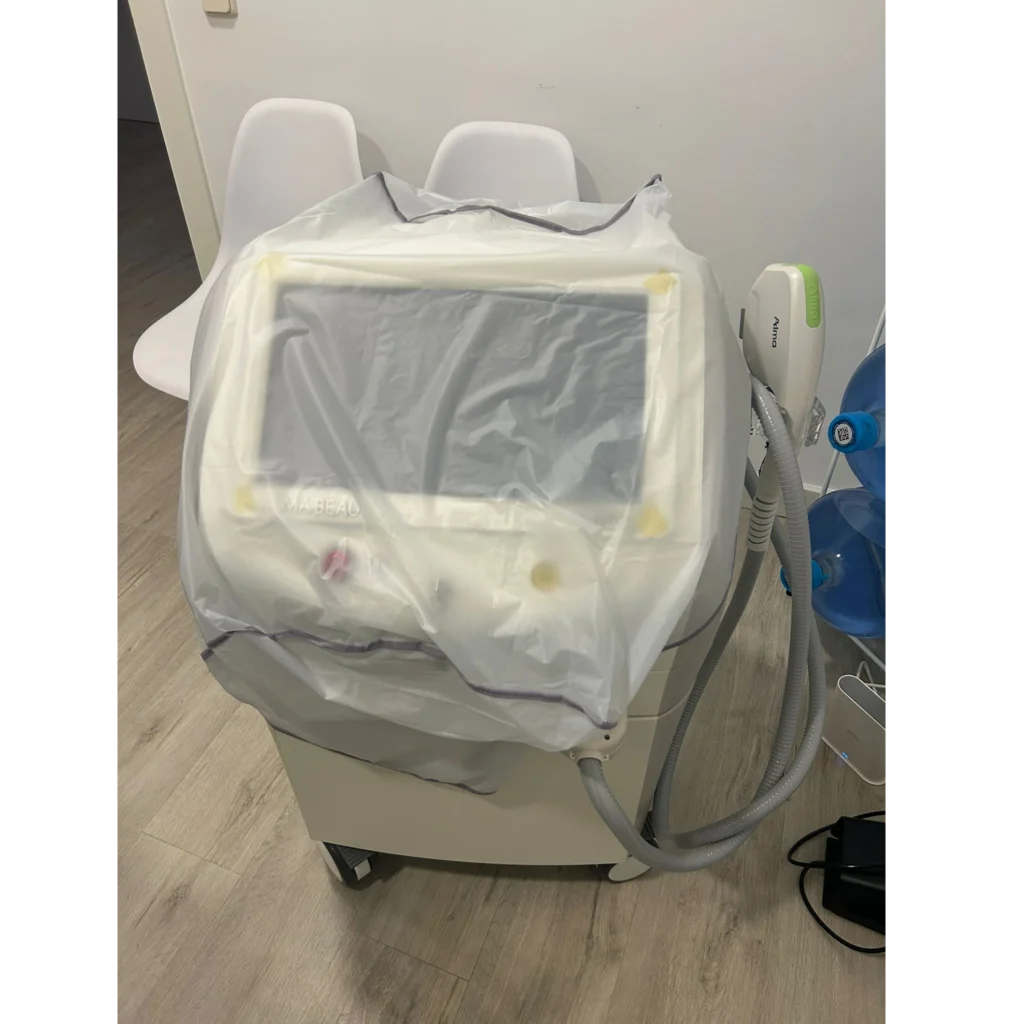 How to Compare Quotes for the Same Used Aesthetic Device ModelKnowledge
 Used Medical Aesthetic Device Condition Grades: New, Like-New, Excellent, Working, and PartsKnowledge
 Eufoton Endolift Lasemar 1500 L: Reading Prices and Building the Right QuoteKnowledge